WordPress is a content management system (CMS) that allows users to host and build websites. A CMS is a tool used to manage a website without the knowledge of programming. For example, if you would like to build a website but don’t have the knowledge to build it from the coding up, you could use a CMS like WordPress, Drupal, or Magento.
You might be wondering why use WordPress. WordPress is the most popular CMS tool that powers over 43.3% of all websites on the internet. That is equivalent to 1 in 4 websites. Along with being free and open-source, WordPress adapts to you so can make any type of website. For more information on why you should use WordPress, check out this blog from Kinsta. Now I am going to explain how to get your WordPress website up and running.
How To Create A WordPress Account
When I first created my WordPress website, I wanted to go through it with as little friction as possible. So I used WordPress to create my domain and hosting. Your domain is the name of your website and hosting is the space on the internet where your website exists.
If you would like more knowledge about where you should get your hosting and domain, I recommend checking out this article by Forbes on the difference between WordPress.com vs. WordPress.org, or this article by HostGator.
If you decided to use WordPress for your domain and hosting you can get a domain on WordPress for free. The contingency is that your domain will say “.WordPress.com” after your domain name. Or you can pay for a domain that has a different top-level domain. For example just “.com” or “.blog”.
Now that you’ve dealt with the logistics let’s get into the creative side of building a website.
How To Build The Bones Of A WordPress Website
- Creative Brief
Before you start building a WordPress website, I highly recommend that you build a creative brief. A creative brief is a document that provides background info for the creative team to develop a creative strategy for the brand. You can check out an example of ReDrew Innovation’s creative brief for a guideline on what yours could look like. If you don’t have the time to make a full creative brief before your website goes up, I would recommend at least creating a value statement framework, brand elements, and brand associations. That will help with designing your site.
- Wireframe
The next step is to create a wireframe. A wireframe is an outline of what your website will look like. It will help to get your ideas out and create consistency across your pages. I recommend building a wireframe on paper as well as a digital copy. Here is what my wireframes look like. I have multiple versions of my wireframes, bettering each design as my vision becomes clearer.
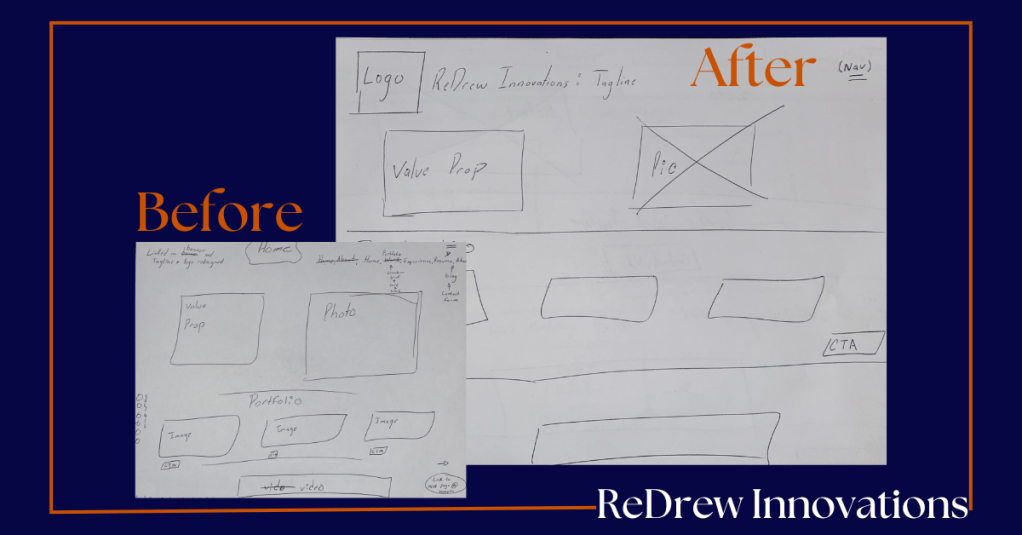
You should create a wireframe for each page on your website. You can then create a digital version of your wireframe using Canva.
- Pick A Theme
Once you have a wireframe it’s time to pick a theme. Depending on your plan, you can choose from hundreds of WordPress themes. It would be best to choose a theme that aligns with your wireframe. Or you can start from scratch with no theme at all. It might seem intimidating to not have a template however I have seen my fellow peers do it as beginners. So it is possible.
It’s also important to keep responsiveness in mind. A responsive web design can seamlessly transfer from one device to another. It provides an optimized user experience which is important as users are turning to mobile devices more. Plus Google prefers mobile-optimized websites, which will help with ranking and SEO. HubSpot provides a great list of free, responsive, WordPress themes.
- Modify Your Theme
Now it’s time to personalize your theme to your brand. This is where your creative brief and wireframe come in handy. With those, you will be able to stay consistent with your brand fonts, colors, tone, logo, etc.
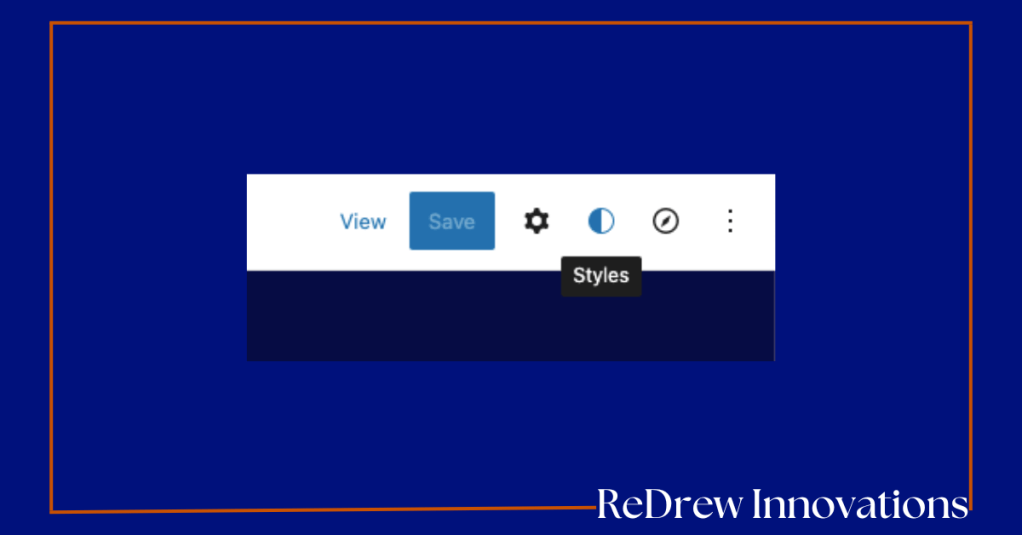
- Site Style
By using the WordPress style button you will be able to change the fonts, colors, and layout of your whole website. The WordPress is a content management system (CMS) that allows users to host and build websites. A CMS is a tool used to manage a website without the knowledge of programming. For example, if you would like to build a website but don’t have the knowledge to build it from the coding up, you could use a CMS like WordPress, Drupal, or Magento.
You might be wondering why use WordPress? WordPress is the most popular CMS tool that powers over 43.3% of all websites on the internet. That is equivalent to 1 in 4 websites. Along with being free and open-source, WordPress adapts to you so can make any type of website. For more information on why you should use WordPress, check out this blog from Kinsta. Now I am going to explain how to get your WordPress website up and running.
How To Create A WordPress Account
When I first created my WordPress website, I wanted to go through it with as little friction as possible. So I used WordPress to create my domain and hosting. Your domain is the name of your website and hosting is the space on the internet where your website exists.
If you would like more knowledge about where you should get your hosting and domain, I recommend checking out this article by Forbes on the difference between WordPress.com vs. WordPress.org, or this article by HostGator.
If you decided to use WordPress for your domain and hosting you can get a domain on WordPress for free. The contingency is that your domain will say “.WordPress.com” after your domain name. Or you can pay for a domain that has a different top-level domain. For example just “.com” or “.blog”. Now that you’ve dealt with the logistics let’s get into the creative side of building a website.
How To Build The Bones Of A WordPress Website
- Creative Brief
Before you start building a WordPress website, I highly recommend that you build a creative brief. A creative brief is a document that provides background info for the creative team to develop a creative strategy for the brand. You can check out an example of ReDrew Innovation’s creative brief for a guideline on what yours could look like. If you don’t have the time to make a full creative brief before your website goes up, I would recommend at least creating a value statement framework, brand elements, and brand associations. That will help with designing your site.
- Wireframe
The next step is to create a wireframe. A wireframe is an outline of what your website will look like. It will help to get your ideas out, and create consistency across your pages. I recommend building a wireframe on paper as well as a digital copy. Here is what my wireframes look like. I have multiple versions of my wireframes, bettering each design as my vision becomes clearer.
You should create a wireframe for each page on your website. You can then create a digital version of your wireframe using Canva.
- Pick A Theme
Once you have a wireframe it’s time to pick a theme. Depending on your plan, you can choose from hundreds of WordPress themes. It would be best to choose a theme that aligns with your wireframe. Or you can start from scratch with no theme at all. It might seem intimidating to not have a template however I have seen my fellow peers do it as beginners. So it is possible.
It’s also important to keep responsiveness in mind. A responsive web design can seamlessly transfer from one device to another. It provides an optimized user experience which is important as users are turning to mobile devices more. Plus Google prefers mobile-optimized websites, which will help with ranking and SEO. HubSpot provides a great list of free, responsive, WordPress themes.
- Modify Your Theme
Now it’s time to personalize your theme to your brand. This is where your creative brief and wireframe come in handy. With those you will be able to stay consistent with your brand fonts, colors, tone, logo, etc.
- Site Style
By using the WordPress style button you will be able to change the fonts, colors, and layout of your whole website. The layout is also where you can change the width of your website (whether or not you want your website closer to the margins).
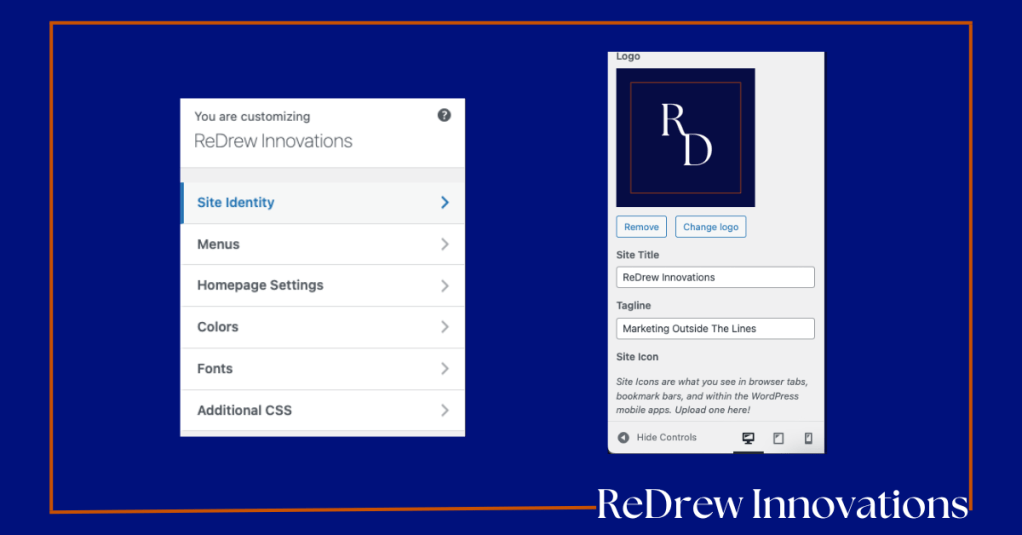
- Logo, Tagline, Site Icon, Site Title
By selecting the appearance tab on your dashboard and choosing customize, you’re able to change your site identity. Here you can change your logo, site title, tagline, and site icon
- Build Your Menu
The next step is to build your menu. I would first start by going to your dashboard, selecting pages, and adding all of the pages you want to add to your website. This is where your wireframe comes in handy as well. Once you have added all your pages go to your dashboard and click appearance, customize, menu, main, and hit “add items” to add your pages to your menu
Now you have to go to “edit my site” or find your way back to your homepage to add your new menu to the navigation bar. Add a navigation bar block if you haven’t already and choose “show more settings”. Under the menu drop-down, you will see there is an “import classic menus” heading, choose “main” and hit save. Your navigation bar should now link to your menu.
- Build Your Header & Footer
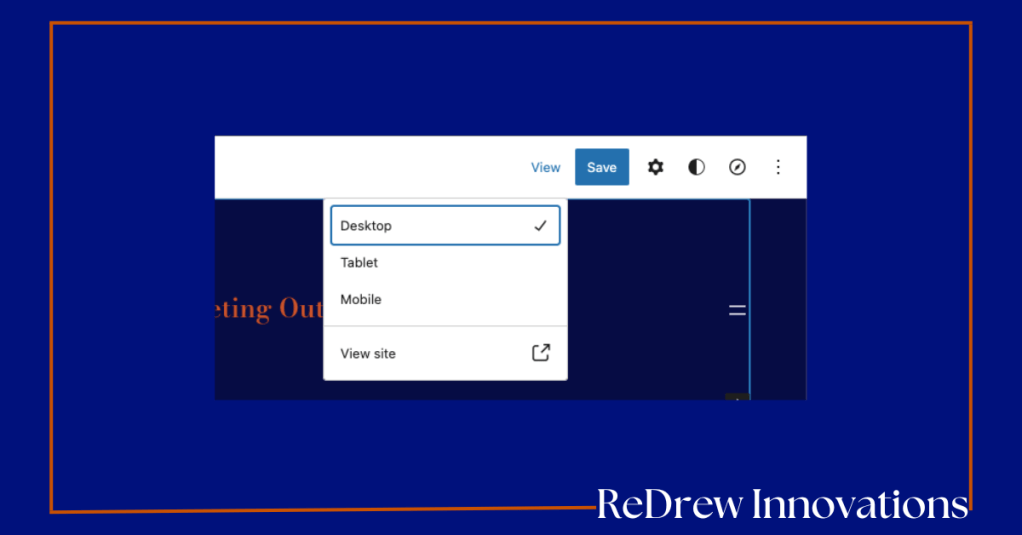
You can either edit the header & footer that your template has already or create a new header & footer with a block. Once created your header and footer, they should be the same throughout your website. Make sure that your header is optimized for different devices as well. You can select the view panel at the top of the webpage to view what your web pages would look like across different platforms.
- Edit Pages
Now that you have the bones of your webpages you can go in and personalize your website to your brand! There are many fun blocks you can use to customize your website. The sooner you get in and start playing around with WordPress, the sooner you will become an expert!
- Post Your Blogs
Now it’s time to post your blogs! Posting blogs can help you with growing your audience, increase your authority for SEO, and could make you a thought leader.
To post a blog, navigate to your dashboard, choose posts, and click “add new post”. From here you can add to your writing, choose a featured image, and add tags. Tags help to categorize your blogs and make it easier for your audience to find your content. So make sure to use tags that are relevant to your content.
- Download Plugins
You can also add plugins if you’re able to. I highly recommend adding Google analytics to your WordPress site so you can view how users are interacting with your webpage. Use this information to see how you can improve your website. Elementor is also a popular plugin used to edit the design of your WordPress site.
I want to note that you should be careful about which plugins you add to your WordPress site as anyone can make a plugin.
Extra “How To” Tips
Now here is a bulleted list of some “how to’s” that I used when creating my WordPress website.
- How To Delete A Theme’s Site Title To Create Your Own
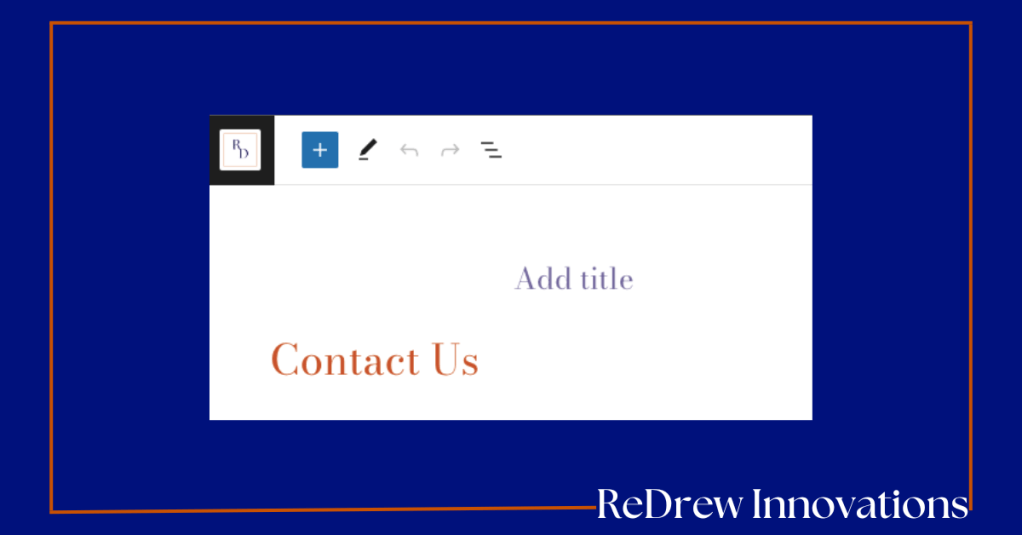
On my WordPress theme, I didn’t like that my page titles were in the middle of my page. I research and found out there was no way to change that because it’s built into the theme. I decided to delete my page titles and use the header block to better align my page. By doing this it also deleted the name of my page from my dashboard, therefore messing with my navigation bar.
If you want to create a different page title than on your theme but still want page title on your navigation bar, this is what you need to do. First, write in the page titles using the spots laid out by the theme. Then go to appearance, customize, menu the hit “add items”, to add your pages to your menu.
I am not sure if this is the best way to have your menu but my “menu location” is checked as “primary navigation”. Click save and go back to your dashboard. Click edit my site on your WordPress dashboard and select “show more settings” on the navigation bar block. On the menu section of “show more settings”, there is an “import classic menu header”. I click primary as my setting. Click save and update the site. Your navigation bar will have the page titles now.
But now you can delete the page titles from all the pages. Click pages, all pages, and go into every page to delete your page titles. Make sure to hit save and update. Add heading blocks to correctly label your pages so users know the content of that page. Now you will have more freedom to edit your page title.
If for some reason you need to add a page or want to change the name of the page you’ll need to add back in all your page titles in the WordPress designated theme spot, save it and then in the navigation block, under “import classic menu” choose a different setting and then choose “primary navigation” again. That will update your navigation menu options. Then you’ll need to go back and delete the page titles from your pages and replace them with the heading block.
- Sharing Buttons
·By selecting tools, marketing, and sharing buttons you can customize the sharing options user see when they’re done reading your blogs also known as posts on WordPress.
- Images Into A Slideshow Gallery
Insert images with a gallery block, and select the entire block. Choose the leftmost button (it looks like an image) and change from “gallery” to slideshow under the “transform too” button. Or add a slideshow block and add your photos.
- Add A Music Playlist
Create a playlist on Spotify that ties well with your creative brief. Add a Spotify block on WordPress and then copy and paste that link to your playlist to the block.
- Add Videos Side By Side
Create columns for your videos, 2 or 3 if that’s how many videos you want side by side. Add the video links in with the video press block.
- Add A Downloadable File To WordPress
Download your file as a PDF. On Canva there is an option to download your designs as a PDF. On WordPress add a files block and choose your PDF file.
After every change you make to WordPress, it’s important that you remember to click save.
Now you have the knowledge to make endless websites on WordPress. Subscribe to my blogs to keep expanding your marketing knowledgeLayout is also where you can change the width of your website (whether or not you want your website closer to the margins).
- Logo, Tagline, Site Icon, Site Title
By selecting the appearance tab on your dashboard and choosing customize, you’re able to change your site identity. Here you can change your logo, site title, tagline, and site icon
- Build Your Menu
The next step is to build your menu. I would first start by going to your dashboard, selecting pages, and adding all of the pages you want to add to your website. This is where your wireframe comes in handy as well. Once you have added all your pages go to your dashboard and click appearance, customize, menu, main, and hit “add items” to add your pages to your menu

Now you have to go to “edit my site” or find your way back to your homepage to add your new menu to the navigation bar. Add a navigation bar block if you haven’t already and choose “show more settings”. Under the menu drop-down you will see there is an “import classic menus” heading, choose “main” and hit save. Your navigation bar should now link to your menu.

- Build Your Header & Footer
You can either edit the header & footer that your template has already or create a new header & footer with a block. Once created your header and footer, they should be the same throughout your website. Make sure that your header is optimized for different devices as well. You can select the view panel at the top of the webpage to view what your webpages would look like across different platforms.
- Edit Pages
Now that you have the bones of your webpages you can go in and personalize your website to your brand! There are many fun blocks you can use to customize your website. The sooner you get in and start playing around with WordPress, the sooner you will become an expert!
- Post Your Blogs
Now it’s time to post your blogs! Posting blogs can help you with growing your audience, increasing your authority for SEO, and could make you a thought leader.
To post a blog, navigate to your dashboard, choose posts, and click “add new post”. From here you can add in your writing, choose a featured image, and add tags. Tags help to categorize your blogs and make it easier for your audience to find your content. So make sure to use tags that are relevant to your content.
- Download Plugins
You can also add plugins if you’re able to. I highly recommend adding Google analytics to your WordPress site so you can view how users are interacting with your webpage. Use this information to see how you can improve your website. Elementor is also a popular plugin used to edit the design of your WordPress site.
I want to note that you should be careful about which plugins you add to your WordPress site as anyone can make a plugin.
Extra “How To” Tips
Now here is a bulleted list of some “how to’s” that I used when creating my WordPress website.
- How To Delete A Theme’s Site Title To Create Your Own.
On my WordPress theme, I didn’t like that my page titles were in the middle of my page. I research and found out there was no way to change that because it’s built into the theme. I decided to delete my page titles and use the header block to better align my page.By doing this it also deletes the name of my page off of my dashboard.
If you want to create a different page title than on your theme but still want page title on your navigation bar, this is what you need to do. First right in the page titles using the spots laid out on the theme. Then go to appearance, customize, menu the hit “add items”, to add your pages to your menu.
I am not sure if this is the best way to have your menu but my “menu location” is checked as “primary navigation”. Click save and go back to your dashboard. Click edit my site on your WordPress dashboard and select “show more settings” on the navigation bar block. On the menu section of “show more settings”, there is an “import classic menu header”. I click primary as my setting. Click save and update the site. Your navigation bar will have the page titles now.
But now you can delete the page titles off of all the pages. Click pages, all pages, and go into every page to delete your page titles. Make sure to hit save and update. Add in heading blocks to correctly label your pages so users know the content of that page. Now you will have more freedom to edit your page title.
If for some reason you need to add a page or want to change the name of the page you’ll need to add back in all your page titles in the WordPress designated theme spot, save it and then in the navigation block, under “import classic menu” choose a different setting and then choose “primary navigation” again. That will update your navigation menu options. Then you’ll need to go back and delete the page titles from your pages and replace them with the heading block.
- Sharing Buttons
·By selecting tools, marketing, and sharing buttons you can customize the sharing options user see when they’re done reading your blogs also known as posts on WordPress.
- Images Into A Slideshow Gallery
Insert images with gallery, select the entire block. Choose the leftmost button (it looks like an image) and change from “gallery” to slideshow under the “transform too” button. Or add a slideshow block and add your photos.
Add A Playlist
Create a playlist on Spotify that ties well with your creative brief. Add a Spotify block on WordPress and then copy and paste that link to your playlist to the block.
Add Videos Side By Side
Create columns for your videos, 2 or 3 if that’s how many videos you want side by side. Add in the video links using a video press block.
Add A Downloadable File To WordPress
Download your file as a PDF. On Canva there is an option to download your designs as a PDF. On WordPress add a files block and choose your PDF file.
After every change you make to WordPress, you must remember to click save.
Now you have the knowledge to make endless websites on WordPress. Subscribe to my blogs to keep expanding your marketing knowledge!

Leave a comment